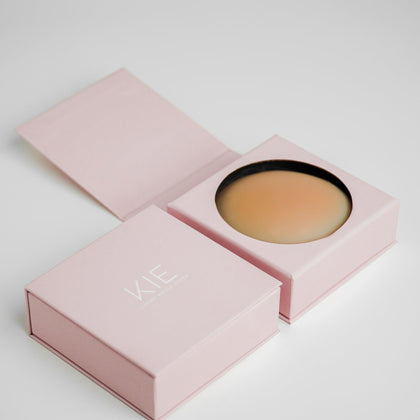
Body tape is the wardrobe tool that rescues plunging necklines, backless dresses, and dramatic slits — and also the one most people apply wrong the first time. Here is the complete guide: skin prep, placement for every dress type, how long it actually holds, and the removal technique that prevents the red rectangular marks that ruin it.
What body tape actually is
Body tape is a skin-safe, double-sided (or single-sided, depending on form factor) pressure-sensitive adhesive designed for short-term wear against skin and fabric simultaneously. The adhesive chemistry is closer to a medical bandage than household tape — it's formulated to hold under movement and perspiration, then release without tearing skin when you remove it correctly.
Two form factors dominate:
- Premium body tape (roll) — a longer continuous strip you cut to length. Best for lining a neckline edge, securing a deep-V to skin, or anchoring a slit. The Kie Skin Premium Body Tape is this format.
- Pre-cut strips (packs) — fixed short lengths, faster to apply, best for point-fixes like bra-strap securing or shoulder stability. The Kie Tape 25-pack is this format.
Which you need depends on the garment. A backless dress wants a continuous roll; a slipping bra strap wants pre-cut strips.
The skin-prep rule (the single biggest cause of failure)
Body tape holds on skin only if the skin is in three states at once: clean, fully dry, and oil-free. Missing any one of these is why tape slips off during the night.
- Wash the tape zone with soap (a fragrance-free bar soap or body wash). Rinse thoroughly.
- Dry completely. "Towel-dry" is not enough — wait 3-5 minutes after towelling. Any residual moisture dissolves the adhesive.
- No lotion, body oil, sunscreen, or self-tanner on the tape zone for at least 30 minutes before applying. If you need to moisturise elsewhere, moisturise around the tape area only.
- Natural body oil production is the slow killer — if your skin is very oily, wipe the tape zone with a micellar-water-dampened pad and then let it dry before applying.
Every "my tape didn't hold" troubleshooting conversation comes back to one of those four points.
How to place for each dress type
Plunging V-neckline
The tape's job is to hold each side of the neckline against the inner-breast skin so the fabric stays where it's meant to when you move.
- Put the dress on.
- Adjust the neckline to where you want it to sit.
- Lift one side of the neckline. Apply a strip of tape to the inside edge of the fabric, then press it to your skin underneath.
- Repeat on the opposite side.
- For deep plunges, add a third piece at the point of the V to hold the two sides together.
Backless dress
This one needs the roll — a pre-cut strip isn't long enough.
- Put the dress on. Adjust to final position.
- Cut a length of tape that matches the dress back opening plus 1cm on each end.
- Peel one side of the tape liner. Press the tape to the inside edge of the dress fabric along the back opening.
- Peel the second liner. Press the dress (and tape) down to your skin, working from centre outward to avoid wrinkles in the tape.
- If the dress has a low back plus a side cut-out, use a separate short strip at the side-cut point.
Strapless dress / top
Body tape's job here is not to hold the dress up — the dress structure does that. Tape just stops slippage during movement.
- Put the dress on.
- Apply short strips at the top edge where the dress sits against skin — 3 o'clock, 12 o'clock, 9 o'clock if looking down from above.
- For longer wear, add two more strips along the side ribs where the dress tends to slide down.
High-slit skirts and dresses
- Put the garment on, sit and stand once to let it settle.
- At the top of the slit, apply a short strip inside the seam to hold the two sides together when you cross your legs.
- Don't tape lower down — that restricts movement and shows as a rectangle through fabric.
Sheer bodice (bra alternative)
For a sheer or illusion-neckline garment where wearing a bra isn't an option, reusable nipple covers are the right tool — body tape is not designed for that.
How long it holds
Assuming correct skin prep, a good quality body tape holds 8-12 hours through normal event wear. Published adhesive literature frames the degradation curve like this:
- Hours 0-4: full hold. No movement risk.
- Hours 4-8: still fully secure for seated/standing/walking. Aggressive dancing may loosen edges.
- Hours 8-12: edges may start lifting; centre hold still fine. Pat edges back down if you can.
- Hours 12+: loss of hold is likely — plan to re-apply or change.
Outdoor heat, heavy dancing, and high humidity all accelerate the curve.
How to remove without leaving marks
This is where most people cause the red rectangular marks that some call "tape bruising" — except it's not bruising, it's adhesive trauma, and it's preventable.
- Take a warm shower before removing. The heat and moisture soften the adhesive.
- While still in the shower, get one corner under water and peel slowly toward the centre. Never pull straight out from skin.
- If the adhesive is stuck, don't fight it — apply a small amount of body oil (olive oil, coconut oil, baby oil) and massage gently. The oil breaks the adhesive bond within 30 seconds.
- Wipe away any residual adhesive with a cloth.
- Moisturise the area after drying.
If a red mark does appear despite correct removal, don't panic — it fades within 1-2 hours for most skin types.
When body tape is the wrong tool
Some situations call for something else:
- Wearing the garment for 14+ hours with active movement. Consider a sewn-in bodysuit or stylist tape plus corset boning instead.
- Sheer bodice or see-through fabric where the tape would show. Use seamless nipple covers in the right skin-tone.
- Known adhesive allergy. If you've had reactions to medical adhesives or bandages, patch-test a 3cm piece on your inner forearm for 24 hours before using it on your body.
- Broken or irritated skin in the tape zone. Skip and pick a different garment.
Troubleshooting
| Problem | Likely cause | Fix |
|---|---|---|
| Tape slipped off within an hour | Skin not fully dry or oil transfer | Wash, dry 5 min, re-apply with fresh strip |
| Red rectangle after removal | Too-aggressive removal | Warm shower + oil next time |
| Tape visible through fabric | Wrong colour tape or wrong placement | Use clear or skin-tone-matched; move tape further inside seam |
| Itching during wear | Possible mild adhesive sensitivity | Remove immediately; patch-test next time |
| Tape ends lifting | Motion or body heat | Pat edges down; apply slightly longer pieces next time |
Related reading
- Nipple covers vs bra — when each actually makes sense.
- Body tape vs fashion tape vs medical tape — the real differences.
The Kie Skin lineup
- Premium Body Tape (roll) — the flagship, for continuous application on backless and plunging necklines.
- Luxury Nipple Covers (2 pairs) — reusable silicone, skin-tone matched.
- The full Kie Skin collection.
References
- American Academy of Dermatology — Contact Dermatitis Overview — American Academy of Dermatology (accessed 2026-04-22)
- Medical Adhesive-Related Skin Injuries — peer-reviewed clinical consensus — PubMed / Journal of Wound, Ostomy and Continence Nursing (accessed 2026-04-22)
- FDA — Medical Adhesive Device Classification (21 CFR 880) — US Food and Drug Administration (accessed 2026-04-22)
- Pressure-sensitive adhesive chemistry and skin interaction — review — PubMed / Skin Research and Technology (accessed 2026-04-22)
Discover more from Kie Skin or browse the full Kie Skin collection.
Frequently asked
What does "How to Use Body Tape: The Complete Application Guide" cover?
This piece walks through the topic, context, and practical implications laid out in the article body above — focused on giving you a clear, sourced read rather than a quick listicle. Use it to deepen your understanding of the brand, category, or product family discussed.
Who is this article written for?
Readers shopping the brand or category covered, plus curious browsers researching independent makers stocked at Curated Sense. Both casual shoppers and trade buyers will find the same source-linked perspective.
How does Curated Sense vet the brands featured in journal articles?
Every brand in our journal has been onboarded directly: live inventory sync with the brand's own catalog, links back to the maker's own .com, and quality checks against return-rate, fulfillment-time, and customer-message-volume thresholds. We don't run sponsored placements in our journals.
Where can I shop the products discussed in this article?
Open the brand's collection or sub-collection page linked above to see current stock. Each product card opens a full Curated Sense product page with sizing, materials, the maker's own description, and the brand's live shipping policy.
EDITOR'S PICK
Kie Skin Luxury Nipple Cover (2 Pairs)
Step-by-step body-tape application is easier with KIE Skin's skin-tone-matched, strong-adhesive tape — no slippage, no residue.
Shop KIE Skin →